
How to Measure Your Bra Size at Home: The Master 4-Step Guide
Let’s be incredibly honest for a moment: wearing the wrong bra size isn't just a minor annoyance that you can easily brush off—it can be a source of profound daily discomfort and even chronic physical pain. If you've spent years dealing with slipping shoulder straps, rigid underwires brutally digging into your ribs, or an underband that constantly rides up your back like an escalator, please know that you are not alone. You are absolutely not the problem.
In fact, the vast majority of women have been taught completely incorrect, archaic ways to measure their bodies. This misinformation isn't an accident. It is largely due to outdated retail practices that prioritize squeezing women into a limited inventory of profitable sizes, rather than honoring the actual, diverse architecture of the human body. Finding a garment that respects your unique shape should not be this difficult.
Establishing your true, mathematically accurate bra size is a deeply empowering process. It represents a paradigm shift in how you relate to your body and your clothing. Best of all? It takes less than three minutes, requires nothing more than a cheap, soft fabric measuring tape, and can completely transform the way your wardrobe fits and how your body feels at the end of a long, exhausting day. We are officially throwing out the archaic "+4 method" (the harmful retail trick of adding four inches to your ribcage) and focusing exclusively on modern, direct anthropometric measurements.
In this comprehensive, empathetic guide, we will walk you through the exact, step-by-step methodology to accurately capture your true underbust and full bust dimensions. We understand that confronting measuring tapes can sometimes be emotionally fraught, but we are here to make it simple, clear, and logical. By following these four simple, heavily illustrated steps, you will discover your true baseline size and unlock a world of supportive, breathable, and truly comfortable lingerie. Let's get started on finding your perfect fit.
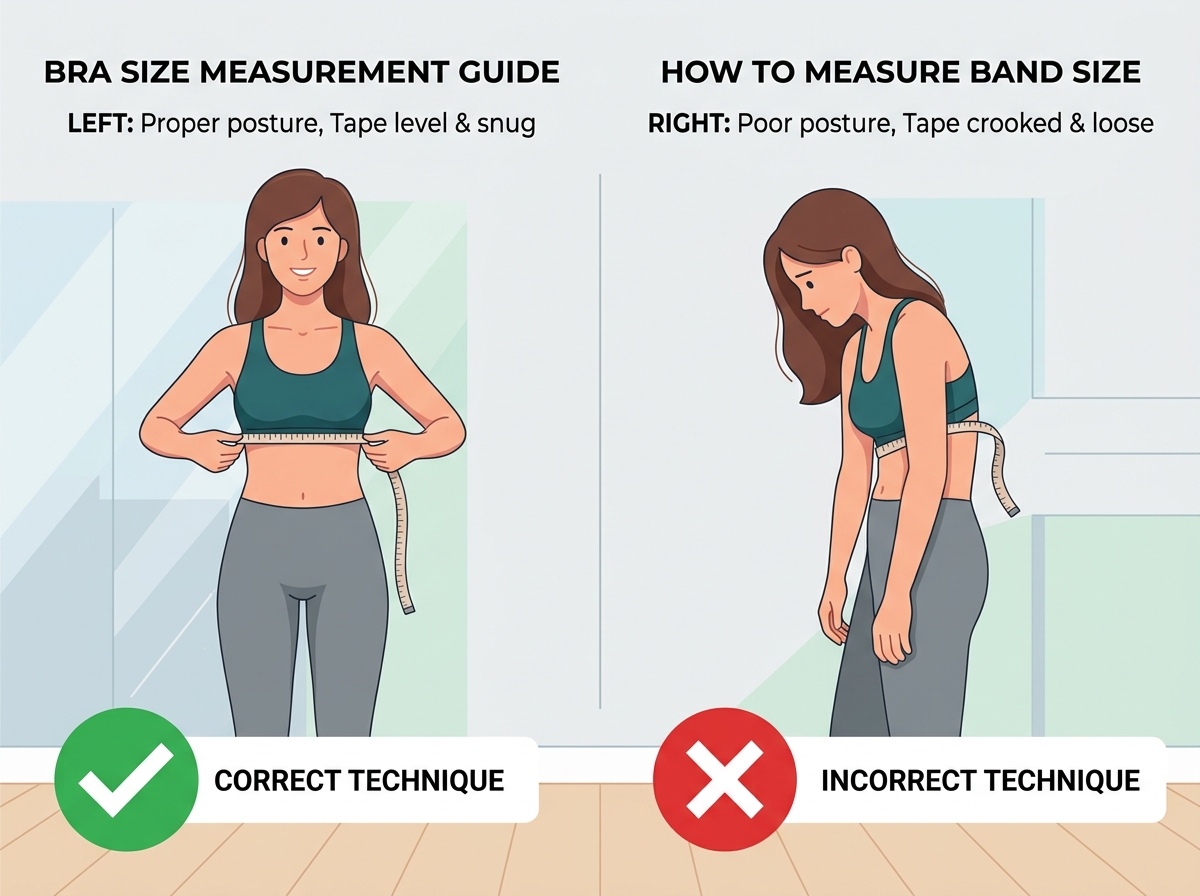
Step 1: Measure Your Underbust (The Foundation)
Think of your bra band exactly like the concrete foundation of a house. It is the core structural element. Up to 80% of a bra’s total lift and support should come directly from the band gripping your ribcage, not from the fragile shoulder straps. If the band is too loose, the entire structural integrity fails, leaving your shoulders to bear a heavy, painful load.
To get this crucial measurement right, strip down so you are bare-chested (or wearing a completely unlined, non-padded bra). Stand upright in front of a full-length mirror with your shoulders relaxed. Wrap the soft measuring tape snugly around your ribcage wall, positioning it directly beneath your breast fold (the inframammary fold, where the breast tissue meets the chest wall).
Pro Tips for Absolute Accuracy:
- Strict tape position: Keep the measuring tape strictly level across your back, parallel to the floor. Use the mirror to check your back profile—it is remarkably easy for the tape to accidentally slope downward, which will drastically inflate your measurement.
- Tension is crucial: Pull the tape snug against your ribcage wall. The tape should feel firm and simulate the tight grip of a supportive elastic band. It shouldn't compress your lungs painfully, but it must be tight enough not to slip.
- Mind your exhalation: Take a deep, natural breath in, and then exhale fully. Record your measurement right after you exhale, when your ribcage is in its neutral, relaxed state. Do not artificially expand your chest.
Write this number down immediately. This is your raw, unfiltered underbust measurement. It is the undeniable anchor point for determining your accurate band size.
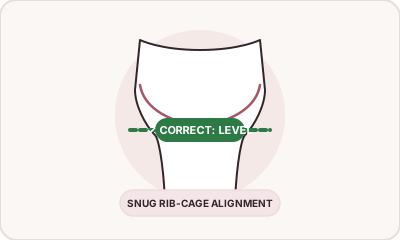 Figure 1: Correct level underbust placement. Notice how parallel the tape remains.
Step 2: Measure Your Full Bust (Total Volume)
Now it’s time to determine your total cup volume. While the underbust required a firm, gripping tension, measuring your bust requires a much more delicate touch. You do not want to accidentally compress or squish the soft breast tissue, as this will result in a cup size that is painfully small. Wrap the measuring tape loosely around the fullest part of your chest, which is typically across the level of the nipple apex.
The Advanced Two-Measurement Strategy:
Because human bodies are diverse, breast tissue density varies wildly from person to person. To ensure we capture your true volume, we highly recommend taking two separate measurements:
- Tape position: Just like step one, ensure the tape remains strictly horizontal across your back without drooping downward. It should lightly skim the surface of your skin without digging in.
- The Standing Measure: While standing completely upright with good posture, record your fullest bust measurement. For individuals with firmer, self-supporting breast tissue, this single measurement is often perfectly sufficient.
- The Leaning Measure (Crucial for soft tissue): If your breasts are softer, pendulous, or have lost some top fullness due to age, weight loss, or breastfeeding, a standing measurement alone will severely underestimate your true volume. Bend 90 degrees forward at the waist (so your back is flat and parallel to the floor). Let gravity pull the tissue forward and record a second bust measurement. If this number is more than 1 to 2 inches larger than your standing measurement, you should take the average of the two numbers for the most mathematically accurate cup volume.
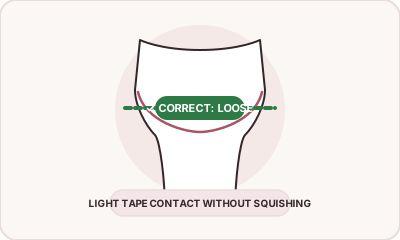 Figure 2: Correct loose bust placement. The tape must skim, never squish.
Process Your Numbers with Precision
You've done the hardest part: you have bravely confronted the tape measure and gathered your body's true, unvarnished metrics. Now, let technology do the heavy lifting. Instead of relying on confusing, contradictory sizing charts found on retail websites, input your exact raw underbust and bust numbers into our highly calibrated system.
Our free, algorithm-driven Bra Size Calculator instantly processes the exact mathematical differential between your band and bust. It strips away retail bias to reveal your highly accurate, completely unbiased baseline starting size.
Step 4: Decode the Bra Sizing Matrix
Discovering your mathematically calculated baseline size is a monumental breakthrough moment. However, we must be realistic: human bodies are wonderfully dynamic, organic, and asymmetrical, while bras are rigidly manufactured garments. Furthermore, bra sizing is notoriously, frustratingly inconsistent across different global brands. Once you have your baseline, you need to understand how to intelligently navigate the wider matrix of sizing options. Your calculation results will arm you with several critical pieces of data:
1. Your Baseline Target Size
Your primary calculated baseline (for example, a 34DD in US/CA sizing) is your starting block. It is not an absolute law, but it is the best place to begin. Start by trying on a few different styles in this exact size to assess the fit before making any dramatic adjustments.
2. The Crucial Sister Size Matrix
This is the secret weapon of lingerie fitting. If you try on your baseline size and the band feels suffocatingly tight but the cup volume is absolutely perfect, you cannot just go up a band size. If you do, the cup will also get larger! You must go up a band size AND go down a cup letter to maintain the exact same volume. Use our Sister Size Tool to seamlessly explore these equivalent cup volumes.
3. International Equivalents
Did you know that cup letters diverge wildly once you venture past a DD? An American 'H' cup is vastly smaller than a UK 'H' cup. If you buy a European brand, the sizing changes entirely. Always rely on our Converter Tool when purchasing from premium international lingerie brands to avoid costly return shipping fees.
4. Advanced Diagnostic Fit Tweaks
Calculators provide a brilliant starting point, but they cannot see the shape of your body. Are you still experiencing quad-boob at the top of the cup? Are your straps constantly slipping off your shoulders? Are the underwires poking you aggressively in the armpit? Check our incredibly comprehensive Fit Guide to diagnose these physical symptoms and learn how to tweak your size for total relief.
7 Critical Measurement Mistakes Ruining Your Fit
It is astonishingly easy to accidentally skew your numbers during the measuring process, resulting in a flawed size recommendation that continues to cause you pain. Be intensely mindful of these common, highly frustrating pitfalls before you pick up the tape.
✕ 1. Measuring over thick or padded clothing
Always measure completely bare-chested, or while wearing a very thin, unlined, and non-padded fabric bra. Foam push-up bras, thick sweaters, or rigid molded cups will add 1 to 3 false inches to your bust circumference. This guarantees the calculator will output a cup size that gapes open at the top and provides zero support.
✕ 2. Allowing the tape to sag across your back
This is the single most common reason women end up with bands that are much too loose. Always use a mirror. If the tape slopes downwards across your shoulder blades—rather than wrapping straight across like a belt—it artificially increases the circumference measurement. It must be strictly level.
✕ 3. Pulling the bust tape too tight
While the underbust tape absolutely needs to be firm to simulate a supportive elastic band, pulling the bust tape tight will instantly compress your delicate breast tissue. The tape should rest lightly on your nipple apexes, just skimming the surface of the skin without indenting it whatsoever.
✕ 4. Holding your breath in
We naturally want to suck our stomachs in when someone brings a measuring tape near our waist or ribs. Do not do this! Holding your breath actually expands your ribcage upwards and outwards. Take a deep breath in, exhale fully to a relaxed state, and gently record the number when your ribs are neutral.
✕ 5. Using a rigid construction tape measure
Metal construction tape measures from the hardware store cannot hug the organic curves and contours of your body. They will create jagged angles and inaccurate readings. You absolutely must use a flexible fabric, vinyl, or fiberglass sewing tape measure.
✕ 6. Swapping your measurement inputs
It sounds completely obvious, but it happens thousands of times a day on our platform: make sure you don't accidentally type your smaller underbust number into the 'Bust' field, and vice versa. Always double-check your numbers before clicking the calculate button.
Frequently Asked Questions
Still have lingering concerns or anxiety about getting the perfect, most accurate measurement? We completely understand. We address the most common, real-world worries right here.
Should I wear a bra while taking my measurements?↓
For the most accurate results, we strongly recommend measuring bare-chested. However, if your breast tissue is particularly pendulous or heavy and measuring without support feels impossible or wildly inaccurate, you can wear a very thin, unlined, non-padded bra. The critical rule here is to avoid anything with foam, molding, or push-up capabilities. Measuring over a padded bra will artificially inflate your bust circumference by at least 1 to 2 inches, virtually guaranteeing the calculator assigns you a cup size that is far too large and unsupportive.
What is the leaning bust measurement method and when should I use it?↓
The leaning bust method is a specialized measurement technique where you bend forward at a 90-degree angle from your waist. By doing this, gravity allows all of your soft or pendulous breast tissue to hang naturally away from your chest wall. If you only take a standing measurement, you might miss the true volume of tissue that has settled or softened. Taking this second measurement while leaning forward helps capture the total volumetric displacement of softer breast tissue. We recommend it for anyone who has experienced significant weight loss, has breastfed, or simply has naturally softer breast composition.
What if my left and right breasts are noticeably different sizes?↓
First, take a deep breath: having asymmetrical breasts is incredibly common and perfectly normal! Almost no one is perfectly symmetrical. When measuring, you should always measure to accommodate the volume of your larger breast. If you measure for the smaller side, your larger breast will spill out, causing painful quad-boob and severe wire digging. It is infinitely easier to tighten the shoulder strap on the smaller side, or simply slip a silicone cutlet or fabric insert into the cup of the smaller breast, than it is to deal with painful cup spillage on the larger side.
Why do major retailers still use the '+4 method' if it is outdated?↓
The notorious +4 method (which involves adding 4 inches to your raw underbust measurement) is a relic from the 1930s. Back then, bra bands were made of rigid, unyielding fabrics without modern elastics, so women literally needed 4 extra inches just to breathe. Today, bands are constructed with highly elastic spandex and elastane that stretch naturally. Adding 4 inches now simply gives you a loose, unsupportive band and forces you into a cup size that is too small. Unfortunately, many mainstream retailers still use this archaic method because it allows them to fit a wider range of women into a extremely limited size matrix (like 32-38 A-DD), saving them millions of dollars in manufacturing costs at the expense of your comfort.
Exactly how tight should the measuring tape be for the underbust?↓
The measuring tape should be pulled very snugly—almost tightly—against your ribcage wall. Think about it this way: your bra band is the foundational architectural support of the garment. It must provide up to 80% of the heavy lifting. If you measure loosely, the resulting band will be too loose to anchor to your body, forcing your shoulder straps to take all the weight, leading to neck and shoulder pain. The tape needs to simulate a firm, gripping, supportive elastic band. It should press into your skin firmly, but it should not restrict your breathing or cause actual pain.
Can my menstrual cycle or period affect my bra measurements?↓
Absolutely, without a doubt. The hormonal fluctuations associated with your menstrual cycle can cause significant water retention and swelling in your breast tissue. Many women find that their breasts become extremely tender and swell by an entire cup size (or more) in the days leading up to their period. Because of this, it is always best to measure your body when your breasts are at their 'baseline' state. For most women, this is typically a few days to a week after your period has ended.
What should I do if my measurement numbers fall exactly between two sizes?↓
If your underbust measurement falls directly between two band sizes (for example, exactly 31 inches), your best bet is usually to round up to the nearest even number (32) for comfort. However, if your bust measurement falls in between cup sizes, it is almost always better to round up to the larger cup size. A slightly loose cup might result in minor wrinkling of the fabric, but a cup that is too small will cause painful wire digging, breast tissue compression, and the dreaded 'quad-boob' effect. When in doubt, size up the cup.